Knob Kitchen Towel Ring

image

My great-grandma made tons of the little kitchen towels with a crochet top. I’ve done a few myself. But crocheting a topper onto every kitchen towel I own is ridiculous. And the crocheted towel rings that button over a handle are so clever. Except when your one and only handle is miles from the sink. You see, my kitchen has knobs on the cabinets and drawers. Like, 40 of them. I found a general pattern for knob towel rings over at Reflecting the Brightness. So smart! But I decided to start mine a little differently and then also ended up tweaking the middle part. I’m hoping to make more to give away as well as donate to our church’s craft fair. So I’m documenting my version here so that I will have a consistent pattern to follow.


MATERIALS

Size H hook

Worsted cotton yarn


INSTRUCTIONS

For larger ring: Chain 20; join into a ring with a slip stitch (sl st).

Chain 2. Working OVER the ring and tail, 40 dc. (Do not dc into each chain; insert your hook into the center of the ring.) Join with a sl st to top of ch2.

NOTE: At this point, you may need to slide your stitches a bit to make the ring more even.

Now to start the smaller ring: Chain 15; join with a sl st into the base of the chain (top of ch2 from previous round).

NOTE: If your knobs are larger or smaller, simply adjust the number of chains to make the loop fit. My kitchen knobs are 1.5″.

Turn; sc into each stitch around -NOT into the ring (15sc). Sl st into the closest stitch of the larger bottom ring.

Sc into each stitch around bottom ring; join with sl st to first sc of small (knob) ring.

Finish off, sewing in any remaining tails.

image

Be sure to check back, as I’ve only made one of these so far. I just may tweak it a bit more! Thanks for stopping by my little crochet world!
Reasons to NOT have a third baby

I’ve often told my husband Charlie that three kids would be more fun than two. Not as boring, you know? But then you start thinking about what it really means to have three kids. Is it worth it? Here are the arguments you could make against having a third baby:

1. Logistics. When you have three kids, the parents are outnumbered. In numbers, yes. But in reality? Even one kid can sometimes outrule both parents. Plus, in daily life with two kids, it is often only one parent looking out for both kids anyway. There are occasionally divide-and-conquer situations, but deciding who gets which kid can be more trouble than it’s worth.

2. Money. According to statistics, raising kids today costs a bazillion dollars each. Of course it does if you want to lavish them with the biggest and best of everything. Our kids mean the world to us, but giving them more stuff is not necessarily good parenting. And since when are parents required to pay for every last thing like cars and (GASP) college?! We aren’t exactly in the most lucrative profession, so we may not even be able to pay for one kid to go to college. Does that mean we shouldn’t have any kids at all? We are, however, living a debt-free lifestyle and putting money away for retirement (even a teeny tiny bit is in college funds). That is decent parenting even if I say so myself.

3. Time. How can you possibly coordinate a third kid’s schedule along with all the others? This mentality is just a result of our over-busy society. Children and even teens shouldn’t have adult schedules. Choose the basics and use your time more wisely in teaching your kids to master the things they are best at. There’s something to the old saying, “Jack of all trades, master of none.”

4. Sanity. I can’t afford to lose any more of my sanity. But really, I lost it all the moment I became a mom. So this argument is almost not even a valid point.

5. Favoritism/Divided Attention. I would do my two kids a disservice to add another to the mix. Is that so? From what I’ve seen, bringing another sibling into the world has been a great benefit to each of them. My oldest is a fabulous big sister. It has grown her in ways she otherwise wouldn’t. Yes, a second child loses some of the special one-on-one time. But the relationship the two have together far outweighs any loss. Basically, love doesn’t divide with more kids, it multiplies.

Have I talked myself into having a third? I haven’t met a good, loving parent who regretted having too many children. Most of the arguments above have selfishness at their core. Would it be selfish to say I don’t want to live with the regret of not having another baby? Maybe so, but it’s too late for any of these reasons to not have a third. Because we are having another baby! Due around the end of May. We are nervous, yes, but so excited!

“Children are a blessing
and a gift from the Lord.
Having a lot of children
to take care of you
in your old age
is like a warrior
with a lot of arrows.
The more you have,
the better off you will be,
because they will protect you
when your enemies attack
with arguments.”
Psalm 127:3-5 (CEV)

Baby Owl Eye Earrings

IMG_2834.JPG

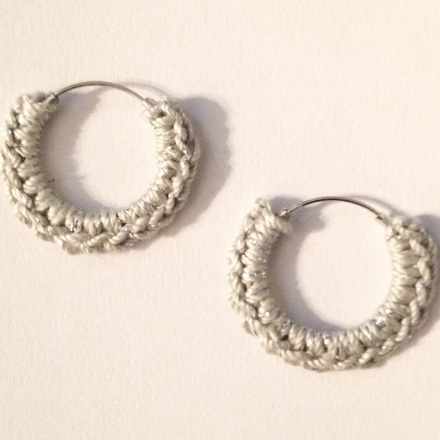
So maybe this whole owl theme is getting ridiculous. But I like themes, so maybe you can put up with it once more? This idea is almost not even worthy of an entire post it’s so simple. There’s that simple theme, though. Plus, perhaps there is someone who needs this quick and easy little project for a boost of encouragement. So here you go!

Materials

Size 3 crochet thread
B hook
2 cm earring hoop (from Walmart)
E6000 glue (from Walmart)

Instructions

Tie a slip knot in your thread and insert hook. Pull tight. You will begin your stitches by holding the thread over the hoop and inserting your hook underneath to grab the thread for your first sc.

Now wait for it…19 sc around the hoop. That’s it! Finish off and weave in your ends. Put a dab of glue on the first and last sc to hold your work in place.

For the second hoop, be sure you begin on the opposite side of the earring. This ensures they look the same when being worn.

Now go make you something pretty to wear!

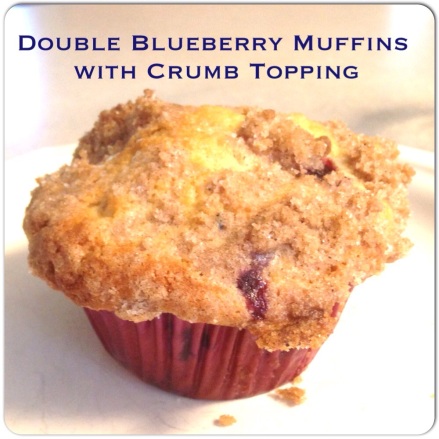
Double Blueberry Muffins with Crumb Topping

IMG_0744.JPG

We have been blessed with an abundance of produce gifts this summer. I have admittedly come a long way in the kitchen the past few years, but I am being stretched in my skills learning not to waste all of the beautiful fruits and veggies!

With the first batch of blueberries we were given, I made Repeat Crafter Me’s Crock Pot Blueberry Crumble. Delicious! And much more healthy than the recipe I’m about to share.

When searching for recipes, I usually use Google first rather than Pinterest so I can see the ratings they’ve been given. I found two blueberry muffin recipes that were highly rated, here and here. I had enough blueberries to try both, but not enough time or calorie allowance. So I combined them!

Double Blueberry Muffins with Crumb Topping

Muffin Ingredients

1 stick unsalted butter, room temperature
1 cup sugar
2 eggs
1 teaspoon vanilla extract
1/4 teaspoon salt
2 and 1/2 cups blueberries
2 cups flour
1/2 cup milk

Topping Ingredients

1/2 cup sugar
1/3 cup flour
1/4 cup butter
1 and 1/2 teaspoons cinnamon

Directions

Preheat oven to 375 degrees. Grease a muffin tin or line with paper liners. Using a mixer of your choice, cream the butter until smooth. Add the sugar and stir. Add the eggs, vanilla, baking powder, and salt. Mix until blended.

With the mixer on low, add 1/2 of the flour, then 1/2 of the milk. Repeat with remaining flour and milk. Fold in the blueberries by hand until incorporated. Fill the muffin cups 3/4 full.

For the topping, mix together sugar, flour, butter, and cinnamon with a fork. Sprinkle over muffins.

Bake 25 minutes and let cool before removing from pan.

Enjoy!

Sleepy Owl Earrings FREE Crochet Pattern

IMG_2529-1.JPG

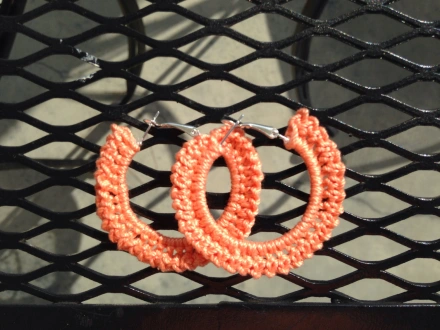
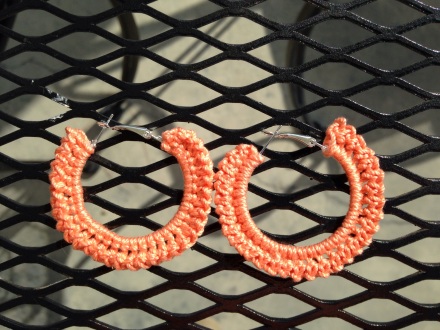
I have seen a lot of hoop earring patterns lately, but you already know I have a flair for simple. So it finally dawned on me that I can apply the same concept as my Owl Eye earring pattern to hoops! Here are the supplies I used:

Size 3 crochet thread
D hook
35mm hoops (from Hobby Lobby)
E6000 glue (from Walmart)

First off, make a slip knot and insert your hook into it. For the first stitch, you will hold the earring with the yarn over the top, then insert your hook under the hoop to grab the thread.

Round 1: 32sc around the bottom portion of hoop. Leave open the earring posts! Some patterns have you sc over the beginning tail, but I find it handy to leave out. More on that later.

Round 2: Turn and chain 1. Slip stitch into first stitch and chain 1. Repeat this process until the end. You will finish with a slip stitch. Then cut the thread and finish off.

For me, the first sc always seems to be a bit loose. I learned after several pairs that leaving the beginning tail out to sew in allows you to tighten that first stitch up.

Once your tails are all tucked in, use a toothpick to put a dab of glue at the first and last stitches to hold your work in place. And here’s some free advice: use petroleum jelly (aka Vaseline) on the tip of your glue before you screw the cap back on. That way you can use it again! Who knew? I didn’t until recently.

IMPORTANT NOTE! For the second earring, begin with the earring facing the opposite direction. This ensures the front side of the stitches is seen when you are wearing the earrings! (I had to actually hold up the earrings to my ears to get this part right.)

Let me know if you have any questions! You are welcome to make and sell items with this pattern. For online sales, please link back to this post!

IMG_2528.JPG

Owl Eye Earrings-FREE crochet pattern

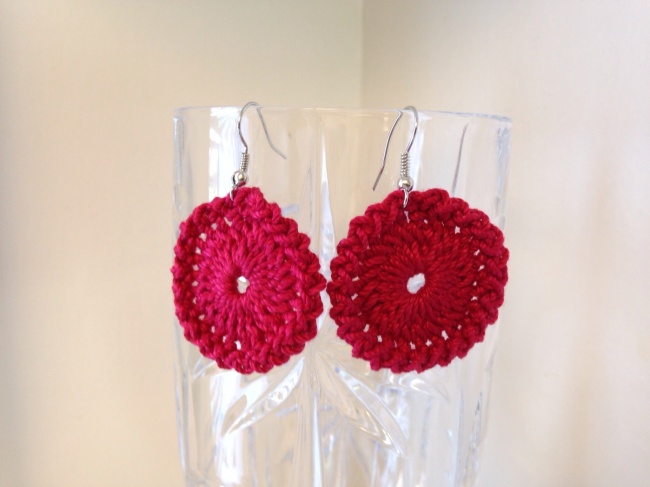
Earrings have perhaps been the most popular item I have sold. I’ve probably given away more earrings than anything else, too! But one problem I’ve encountered with many crochet earring patterns is that for any sort of interest, they usually turn out pretty large. I personally adore large earrings. But not everyone does. For a smaller look, and without basically using sewing thread, you need at the most a 1-2 round earring. What can you do, then, besides a basic circle? In comes my first written pattern!

Image

 hoo-hoo!

PATTERN (make 2)

Form a magic circle/loop.

Round 1: Chain 3 (counts as first DC); DC 23 times inside circle; join at top of beginning chain 3 with a slip stitch, pulling your circle tight.

Round 2: Chain 1; Slip stitch and ch 1 in first stitch and each remaining stitch around; join with a slip stitch at base of first chain.

Finish off and attach fish hooks at the top of each earring made.

Variation: When using worsted weight yarn, you can just DC 12 into the magic loop to make a smaller earring.

Want to save this pattern for later? Add it to your Ravelry queue HERE.